HOW TO USE
How to use
Placing, moving and touching work the same on every device. Only how you point and how you confirm differ.
On this page
- Six steps
- A robot with arms can do a little more
- Record, then replay in the same place
- How to start on your device
- Show the AR view on a PC or a big screen
- Serve the overlaid picture as a camera of its own
- Make a recording from USD or from a ROS 2 log (MCAP)
1. Six steps
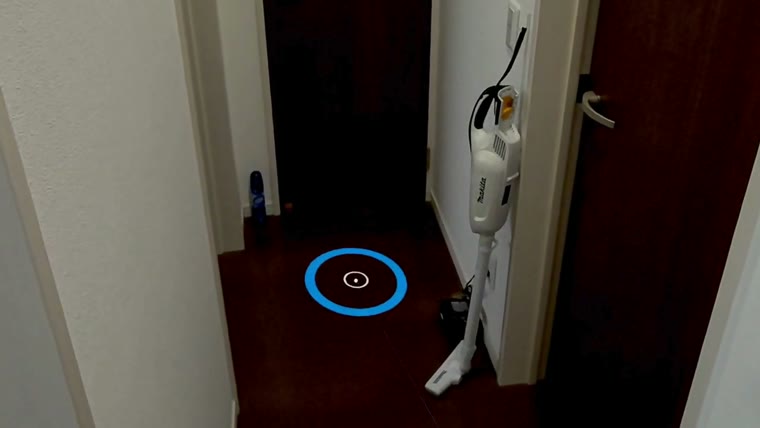
Where to place, where to move. It appears while you point at the floor.
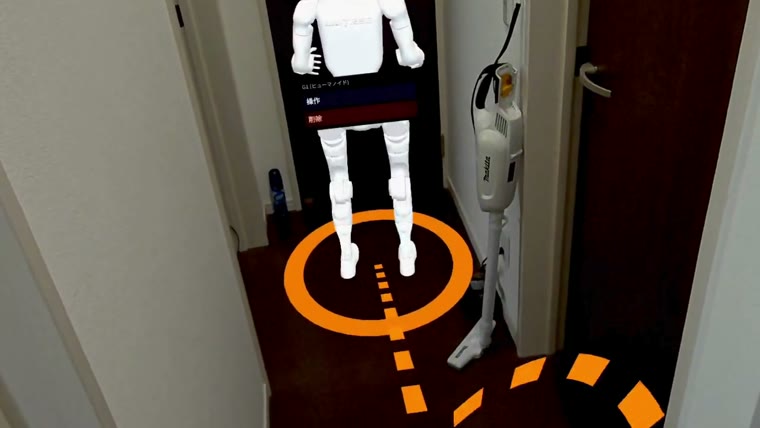
It appears at the feet of the selected robot. A dotted ring is its destination.
1Point at the floor
Point at where you want to place a robot, and a blue ring appears on the floor. It sits on the real floor even where there are steps or a slope.
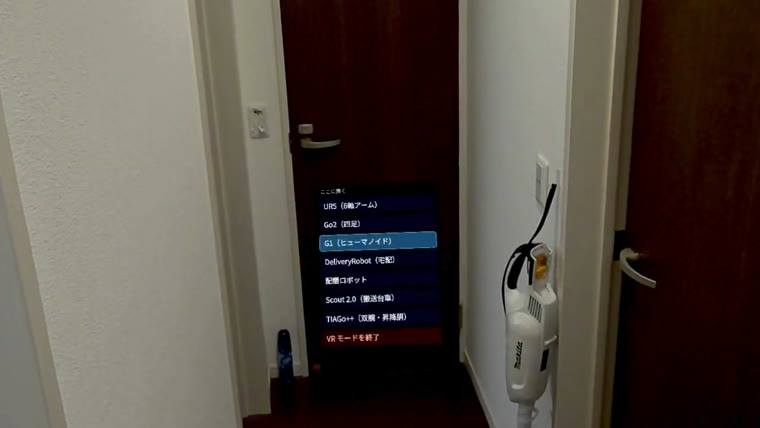
2Choose a model
When you confirm, the menu “Place here” appears. Choose “Place” and this list appears. You can choose from seven models: humanoid, quadruped, arm and AMR.
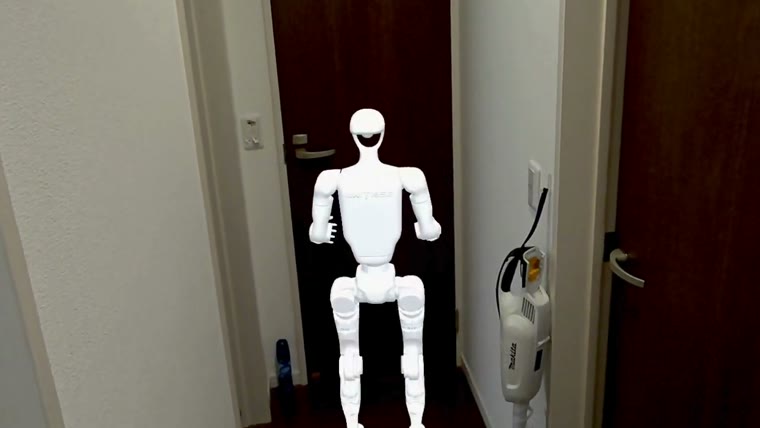
3Place it
It stands there at real size. You can step close and look up, or walk around it.
4Point at where to go
Select a robot you placed and an orange ring appears at its feet. Point at the floor and a dotted ring shows the destination. Point within 8 m of the robot.
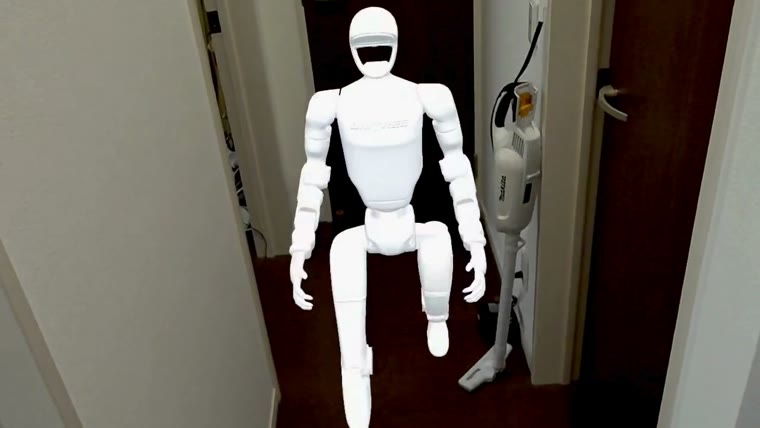
5Move it
When you confirm, it turns that way and walks. A robot with legs moves its legs to match its stride.
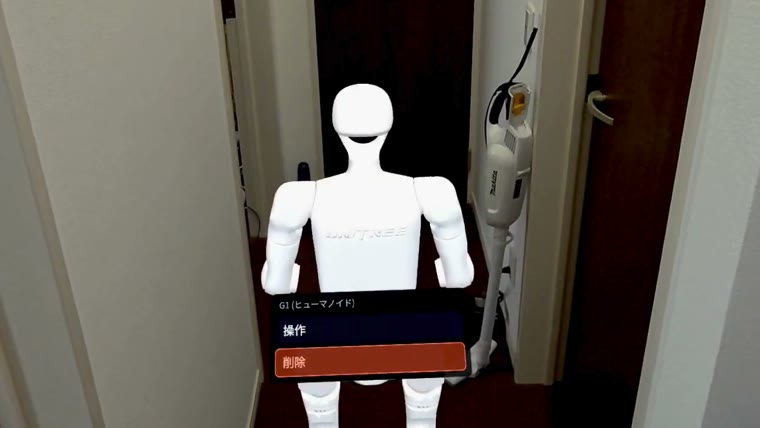
6Operate or remove it
Select a robot and a menu appears. “Operate” (robots with arms only) moves the arms, “Re-place” puts it somewhere else, and “Delete” removes it. Point at ⟲ ⟳ at its feet and confirm to turn it on the spot. You can place as many as you like.
2. A robot with arms can do a little more
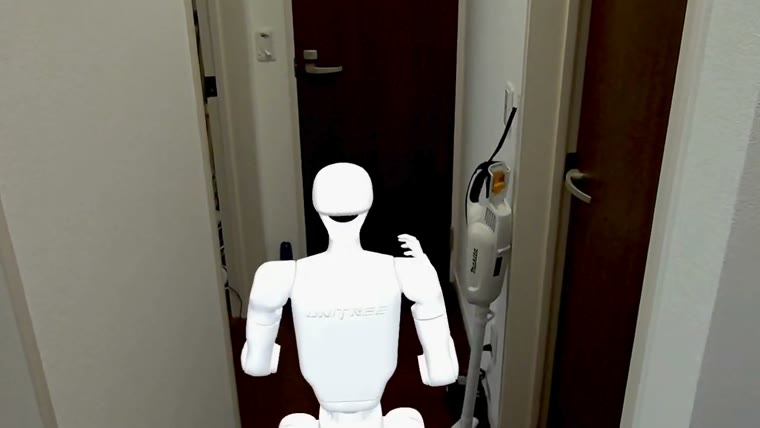
With a VR headset, grip and move your hand and the robot’s hand follows. Move your hand 10 cm and its hand moves 10 cm.
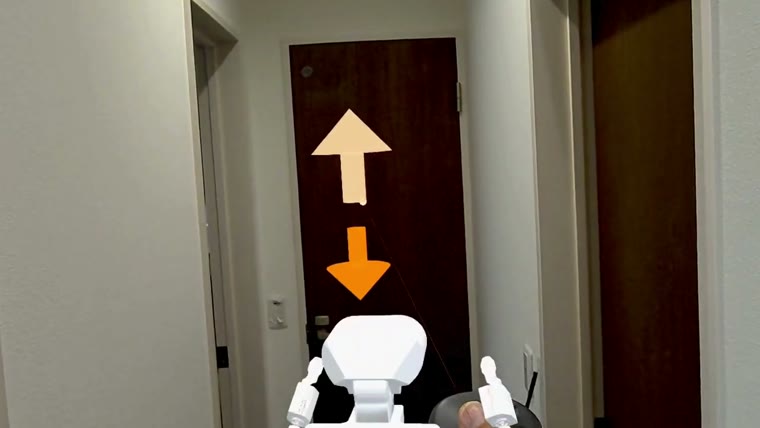
A robot with a lifting torso (TIAGo++) changes its height with the up and down arrows that appear overhead.
3. Record, then replay in the same place
- In the AR menu “Record”, put two marks on the floor and choose “Save recording”. The robots you placed and the paths you moved them along are saved to the server under your account.
- Saved recordings are listed under “Recordings” on the app screen.
- Choose a recording and start AR, put the marks back at the same two places, then choose “Replay” → “Replay recording” in the menu. You see the same movement in the same place.
- Recordings are saved to the server under your account, so the same recordings appear on any device you sign in on. If the connection is lost while saving, the recording waits on the device with a red “Not saved to the server” mark and is sent once the connection is back.
- To hand one to somebody else, write it out as .json with “Save as a file” and they read it in with “Open a file”.
- If you set an MQTT broker in the settings, the devices in a recording can exchange messages over MQTT.
4. How to start on your device
VR headset
A WebXR-capable model (Meta Quest 3 / 3S and others). Use it indoors.
- On a phone or PC, sign in with Google first
- In the headset’s browser, open physicalsandbox.com and press “VR headset sign-in” at the top right (a six-digit code appears)
- On the phone or PC, open “Connect a VR headset” from the icon at the top right of the app, enter the six digits shown in the headset, and press “Allow”
- Press “Try it on site (AR)”
- Point with the right controller and confirm with the trigger
- To close a menu or drop a selection, close your hand into a fist (the grip does the same)
- To end AR, point at the floor, confirm, and choose “Exit AR” in the menu
Without controllers, you can still do it all with your hands alone (pinch = confirm, fist = cancel).
Place, move, arms, torso: all
Android
An ARCore-capable device and Chrome. It works outdoors too.
- Open physicalsandbox.com in Chrome and sign in with Google
- Press “Try it on site (AR)”
- Point the device at the floor and a blue ring appears on the floor at the centre of the screen
- Confirm with “Confirm” at the bottom of the screen
- Select a robot with arms and press “Operate”. Sticks appear at the bottom of the screen. When you finish moving it, press “End”
Tapping the screen directly does not confirm. This is so that a touch alone does not place a robot.
Place, move, arms, torso: all
iOS
Safari does not support WebXR, so you need WebXR Viewer (free).
- Install WebXR Viewer from the App Store
- Open physicalsandbox.com in that app and sign in with Google
- Press “Try it on site (AR)”
- Point the device at the floor and a blue ring appears on the floor at the centre of the screen
- Tap the screen to confirm at the blue ring. In menus, tap an item directly
- Select a robot with arms and press “Operate”. Sticks appear at the bottom of the screen (you can move both at once). When you finish moving it, press “End”
Place, move, arms, torso: all
5. Show the AR view on a PC or a big screen
To show it to people around you or to record it, use the device’s own feature. What you see is shown as it is, and Physical Sandbox needs no setting.
VR headset
Meta Quest’s “Cast”. Connect the headset and the PC to the same Wi-Fi.
- On the PC, open oculus.com/casting in Chrome or Edge and sign in with the same Meta account as the headset
- In the headset, open the menu and choose Camera → Cast
- Choose Computer as where to show it
You can also show it in the Meta Horizon app on a phone.
iOS
With a Mac, you can show it in QuickTime Player and record it as it is.
- Connect the iPhone or iPad to the Mac with a cable
- On the Mac, open QuickTime Player and choose File → New Movie Recording
- From the ∨ next to the record button, choose the connected device
Without a cable, use Screen Mirroring in Control Center to show it on a Mac or an Apple TV.
Android
To a TV or a big screen, use “Cast screen”. The name differs by model.
- Swipe down from the top of the screen to open Quick Settings
- Choose Cast screen (also called Screen Cast, Smart View and so on)
- Choose where to show it (Chromecast, Google TV and so on)
To show it on a PC, there is a free tool, scrcpy, that works over USB.
6. Serve the overlaid picture as a camera of its own
The picture on the PC's "overlay on a video" screen — the camera's picture with the robots over it — can be served the way a network camera serves one. A Node-RED dashboard, a recorder, a robot-learning toolkit (LeRobot, say) reads it as an ordinary camera. The picture stays on your computer and never reaches Physical Sandbox's servers.
What you need
A relay that takes the picture, on the same computer the page is open on.
- A PC and a webcam
- Chrome or Edge
- Node-RED, running on that PC (http://localhost:1880)
- The ps camera node for Node-RED (nodes/node-red-contrib-ps-camera in the open build)
Without Node-RED, run tools/camera_relay.py from the open build instead (http://localhost:8790).
Steps
It is served only while switched on, and the screen says "Serving" throughout.
- Put one ps camera node in a Node-RED flow, name the camera (cam-1), and deploy
- "Try it on site (AR)" → "Overlay on a video on this PC" → "Use a camera"
- Match the grid to the desk or the floor, confirm, and place a robot
- Press Serve this picture in the bar at the top
- If the browser asks whether this site may connect to devices on your local network, allow it
Only the camera's picture and the robots are in it: no grid, no menus, no labels.
Reading it
Anything that can open a camera takes the address.
- As it comes: http://localhost:1880/ps-camera/cam-1.mjpg
- One picture: http://localhost:1880/ps-camera/cam-1.jpg
- Inside Node-RED, each picture (a JPEG) comes out of the node
It can be read from the same computer only. A camera that has sent nothing for five seconds is not served. Not tried on Safari.
7. Make a recording from USD or from a ROS 2 log (MCAP)
A robot's motion made in Blender or elsewhere (USD), or a drive logged with ROS 2 (MCAP), is turned into a recording (.json) first and then opened with "Open a file". Physical Sandbox opens neither USD nor MCAP as it is. The turning is done by a small tool that ships with the open build, on your own computer: the scene never reaches Physical Sandbox's servers.
What you need
The converter under tools/ of the open build (physical-sandbox), run with the PC's Python.
- The open build's repository (GitHub) on the PC; run tools/dev-serve.sh once (it makes the robot data)
- Python 3 and, for USD, pip install usd-core; for MCAP, pip install mcap mcap-ros2-support
- Blender 5.3 or later if you use it (it reads a Gaussian splat directly). Steps in the open build's examples/usd/blender/README.md
The converter translates: the two floor markers become the origin and +x, the robot's joints become angles, time becomes 30 samples a second. Export only what should go and no narrowing option is needed.
USD (Blender and others)
The scene needs the two markers and the robot's model name.
- In Blender, put empties Marker1 and Marker2 under an empty named PhysicalSandbox, where the two floor markers will be
- Stand the robot with the open build's examples/usd/blender/ps_robot_import.py (it sets the model name ps_model). Turn the joint empties and keyframe them
- File → Export → USD with Animation and Custom Properties on, Selection Only
- python3 tools/usd_to_record.py scene.usda --out scene.recording.json --site desk
- In Physical Sandbox, "Open a file" → scene.recording.json, then "Select" → "Try it on site (AR)" → place the two markers → "Replay"
Units and the up axis are read from the USD. For a whole stage from another tool, point at the robot and the markers with --model /World/arm=so101 and --marker1 x,y,z --marker2 x,y,z.
A ROS 2 log (MCAP)
A bag holds everything that was published, so you say which topic is which robot.
- A rosbag2 in sqlite3 form is converted first: ros2 bag convert
- python3 tools/mcap_to_record.py run.mcap --out run.recording.json --site yard --device scout=scout,odom=/odom --device arm=so101,joints=/joint_states
- The two markers, in the map frame: --marker1 x,y,z --marker2 x,y,z. Without them the origin and +x stand in
- "Open a file" → run.recording.json
Read: odometry (nav_msgs/Odometry), one parent–child pair on /tf, joint states (sensor_msgs/JointState). No ROS needed.